Start A Fire With Sticks
1. Gather dry and dead sticks, preferably small and thin ones for kindling and larger ones for fuel.
2. Choose a suitable location with enough open space and away from any flammable objects or structures.
3. Prepare a fire pit by clearing away any debris or vegetation.
4. Find a flat and sturdy surface like a rock or dry ground to serve as your fire base.
5. Take one of the smaller sticks and create a small notch or groove near its center.
6. Lay this stick flat on the fire base and hold it firmly in place.
7. Take a larger stick and place its pointed end into the groove on the smaller stick.
8. Begin to rapidly rotate the larger stick back and forth between your hands, applying downward pressure.
9. Continue this rotation motion with speed and consistency, allowing the friction to generate heat.
10. Over time, the heat will begin to produce smoke and eventually create a small ember.
11. Carefully transfer the ember into a small bundle of dry and flammable material like dry leaves, grass, or bark.
12. Gently blow on the ember to encourage it to ignite the surrounding material.
13. Gradually add more small sticks and twigs to help the flames grow.
14. Continue to feed the fire with larger and thicker sticks as it becomes established.
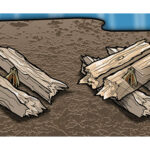
15. Create a teepee or log cabin structure with the larger sticks, leaving enough space for air circulation.
16. Make sure the fire is well-ventilated by keeping the structure loose and open.
17. Utilize any available natural accelerants like dry pine needles or birch bark to aid in the combustion.
18. Monitor the fire closely and keep a safe distance, ensuring it remains under control.
19. Use additional kindling if needed to maintain the fire’s intensity.
20. Once the fire is strong and self-sustaining, feed it with larger logs to maintain a steady heat source.
21. Be mindful of fire safety and never leave the fire unattended.
22. Keep a water source nearby, like a bucket of water or a hose, to extinguish the fire if necessary.
23. Always make sure the fire is completely out before leaving the area.
24. Use caution and respect fire regulations or restrictions in your area.
25. Be aware of weather conditions, such as wind or dry spells, that may impact the spread of the fire.
26. Avoid starting a fire during high-risk situations or in environments prone to wildfires.
27. Practice proper fire-making techniques and develop your skills by experimenting and learning from experience.
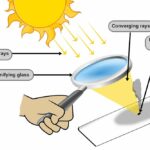
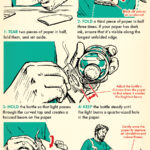
28. Consider using alternative methods such as a magnifying glass, flint and steel, or fire starter kits for easier fire starting.
29. Educate yourself on local fire regulations, restrictions, and safety guidelines before attempting to start a fire with sticks.
30. Lastly, prioritize safety and be responsible when handling fire, ensuring the well-being of yourself, others, and the environment.
More About Start A Fire With Sticks
Welcome to our blog, where we delve into the art of survival and primitive techniques that have been widely forgotten in our modern world. In today’s post, we are going to uncover the ancient method of starting a fire with sticks. Imagine being stranded in the wilderness without any matches, lighters, or other modern tools at your disposal. How would you survive? The ability to create fire from scratch becomes an invaluable skill in such scenarios, allowing you to cook your food, provide warmth, and signal for help.
Fire has played a crucial role in human civilization for thousands of years. Our ancestors harnessed its power and utilized it for various purposes, from cooking meals to scaring away predators. But how did they manage to create fire without the convenience of modern fire-making tools? They relied on their knowledge of natural resources and an understanding of the principles behind fire creation.
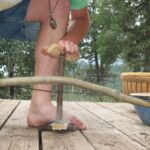
To start a fire without matches or lighters, one of the oldest and most effective methods is the friction fire technique. This method is inspired by the ancient practice of rubbing sticks together or using a “bow drill” to create enough friction and heat to ignite a fire. By skillfully combining different materials and applying the right techniques, you too can achieve this timeless skill.
The key to successful fire creation through friction lies in the choice of materials. In this method, you typically need two types of sticks: the fireboard and the spindle. The fireboard is a flat piece of wood or bark, while the spindle is a long, cylindrical stick. Both should be dry and devoid of any moisture to maximize friction and heat generation. Popular choices for fireboard and spindle materials range from softwoods like cedar or cypress to dense hardwoods like maple or oak. Experimenting with different combinations will help you discover which materials work best for you.
Once you have your materials, the next step is to shape them correctly. Carve a small notch near the edge of the fireboard, creating a small, shallow cavity known as the “burn-in.” This will act as a landing spot for the heated dust created by the friction between the spindle and fireboard. The spindle should be carved into a pointed shape, tapered at one end, which will fit into the palm of your hand. Ensuring that the spindle is smooth and straight will facilitate smooth rotation and minimize friction loss.
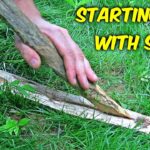
Now comes the challenging part rubbing the spindle against the fireboard using controlled friction. Place the fireboard on the ground and hold it steady with your foot or another solid surface. Position the spindle vertically on the fireboard, with the tapered end resting in the burn-in cavity. Using both hands and applying downward pressure, rapidly roll the spindle back and forth between your palms, moving it up and down the length of the fireboard. The purpose here is to generate enough friction and heat to create an ember, which will eventually lead to a flame.
Mastering the technique of friction fire may require practice and patience. It demands precision, coordination, and perseverance, but once you achieve that magical glow, the satisfaction is immeasurable. Remember to fuel the ember by gently blowing on it and carefully transferring it into a prepared tinder bundle dry leaves, grass, or bark shavings that you have at the ready.
Starting a fire with sticks not only reconnects us with our ancestral roots but instills a sense of self-reliance and resilience. As you learn and practice this ancient survival skill, you will develop a deeper appreciation for the elements around you and gain confidence in your ability to adapt and overcome. Stay tuned for our upcoming articles, as we explore more primitive techniques that empower us to survive and thrive in a world that often takes the power of fire for granted.
Start A Fire With Sticks FAQs:
Q1: How do I start a fire using sticks?
A1: To start a fire with sticks, you need a friction-based method called fire by friction, which involves rubbing two sticks together to create enough heat for ignition.
Q2: What type of sticks should I use?
A2: Select sticks of dry, dead wood, preferably hardwoods like oak or birch. Make sure they are straight and about 1 to 2 feet long.
Q3: What tools would I need to start a fire with sticks?
A3: You will need two sticks or wooden pieces: a long, straight one known as the “bow,” and a shorter, curved one called the “spindle.” Additionally, a sturdy base, strong string, and tinder material like dry leaves or bark are necessary.
Q4: How do I create the bow and spindle?
A4: The bow should be a flexible branch, and the spindle should be straight with a rounded tip. Cut a small notch at each end of the bow and create a small dimple in the spindle’s rounded tip.
Q5: How do I use the bow and spindle?
A5: Place the spindle through the bow’s notches, creating a “bow and drill” setup. Attach the string to both ends of the bow, then loop it around the spindle. Use your hand to apply downward pressure on the spindle while moving the bow back and forth rapidly, creating friction.
Q6: How long should I expect to spend using the bow drill method?
A6: The time required can vary based on your skill, the wood’s dryness, and other factors. It may take anywhere from a few minutes to over an hour to achieve a sustainable ember.
Q7: How do I know when I have produced an ember?
A7: As you rotate the spindle rapidly, check for smoke and the presence of a small glowing coal in the dimple of the spindle. This coal, when transferred to the tinder, will be the ember you need to start your fire.
Q8: What should I do once I have an ember?
A8: Gently transfer the ember from the spindle’s dimple to your prepared tinder nest, a small bundle of easily ignitable material like dry grass, bark, or finely shredded wood.
Q9: How do I blow the ember into a flame?
A9: Cup both hands around the tinder bundle, leaving a small gap for airflow, and blow into it gently, providing the necessary oxygen to fuel the ember. Continue blowing until the ember grows into a small flame.
Q10: How can I ensure safety while starting a fire with sticks?
A10: Always select a safe location away from flammable materials, like dry grass or leaves. Be cautious when handling the bow and spindle, as they may become hot during friction. Finally, fully extinguish the fire once you are done with water or dirt.


